| Version 5 (modified by , 10 years ago) (diff) |
|---|
Login to the VM from Windows using MobaXterm
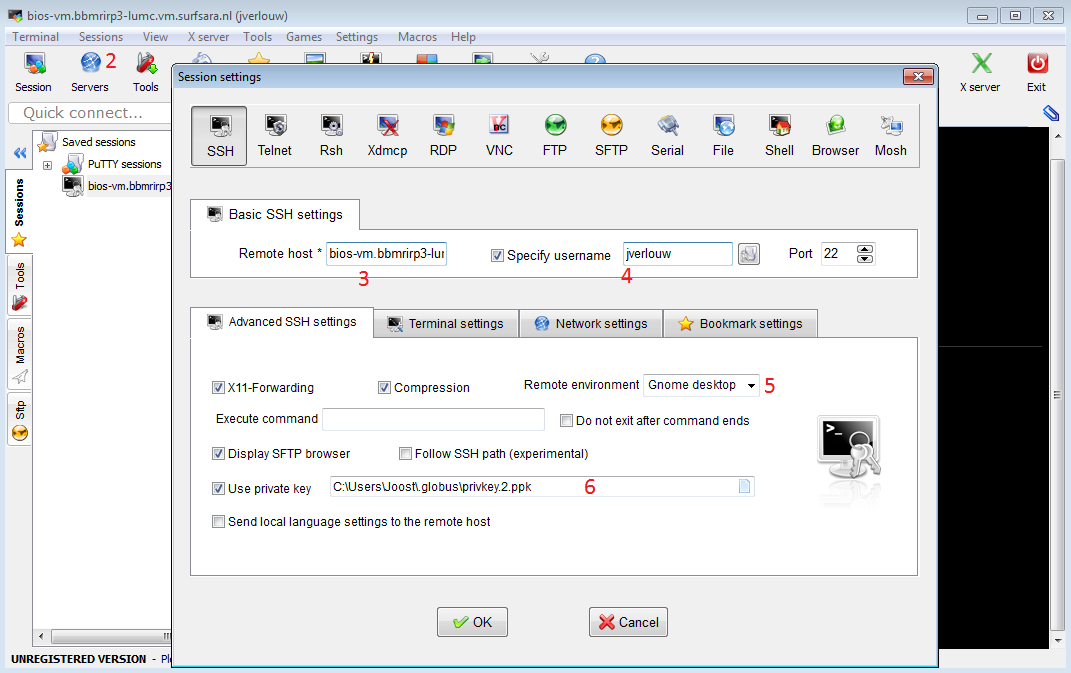
For graphical access from windows use MobaXterm as advised by SURF in the HPC cloud documentation (https://doc.hpccloud.surfsara.nl/access-your-VM).

- Download, install and open MobaXterm.
- Create a new session via Session -> New session.
- Enter
bios-vm.bbmrirp3-lumc.vm.surfsara.nlin the "Remote host" field. - Tick the Specify username box and fill in your VM username.
- Select the remote environment. For a terminal interface use interactive shell, or for a graphical desktop interface use Gnome desktop.
- Select your private key file.
- Start the session you just created.
Login to the VM from Windows or Mac OSX using X2Go
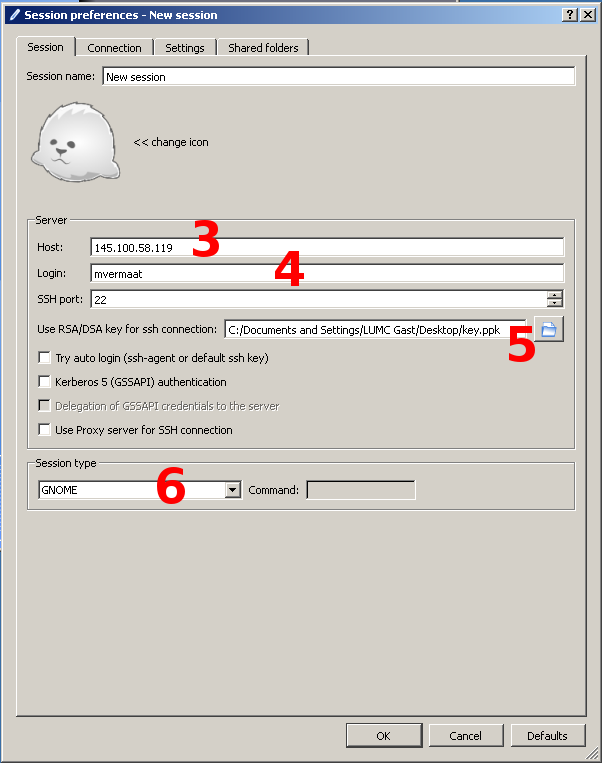
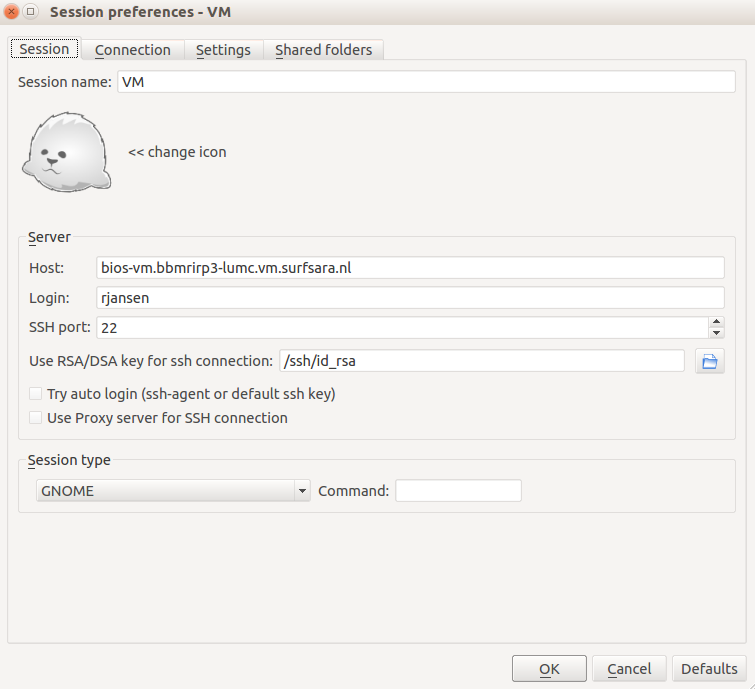
Alternatively for graphical access from Windows, Linux or Mac OSX, use X2Go and configure the VM IP address, your username, your private SSH key and the session type/desktop manager (Gnome).

- Download and open the X2Go program.
- Create a new session (opened automatically, or via "Session" -> "New session").
- Enter
bios-vm.bbmrirp3-lumc.vm.surfsara.nlin the "Host" field. - Enter your username in the "Login" field.
- Click the button next to the "Use RSA/DSA key for ssh connection" field and select your private key.
- Select "GNOME" as "Session type" and click the "OK" button.
- Open the session you just created.
- First time, you will be asked to accept the server's signature (do so).
Another option is to use a remote desktop connection client (for mac: http://www.microsoft.com/nl-nl/download/details.aspx?id=18140).
Attachments (6)
- x2go.png (24.3 KB) - added by 10 years ago.
- MobaXterm.png (82.5 KB) - added by 10 years ago.
- Screenshot from 2016-09-22 11:51:06.png (56.7 KB) - added by 10 years ago.
- x2go.2.png (24.3 KB) - added by 10 years ago.
- xx2go.png (56.7 KB) - added by 10 years ago.
-
x2go_2017.png (79.7 KB) - added by 9 years ago.
new version to fix options/host name
Download all attachments as: .zip